WYSIWYG stands for "What You See Is What You Get". It allows you format content by selecting it then clicking the appropriate formatting options in the toolbar. This section will cover the different options available and how to use them.
WYSIWYG Basics
The WYSIWYG editor offers formating tools similar to those in Microsoft Word but also has some tools that people with Microsoft experience may not be familiar with. This section will cover these options. If you don't see all the tool options below click the show/hide button ![]() to expand the toolbar
to expand the toolbar
Available Formatting Options:
- Bold, Italics, Strike Through

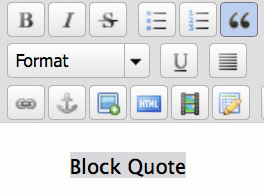
- Make a bulleted or numbered list, blockquote

- Align left, center, or right

- Link to content, unlink, teaser break

- Toggle fullscreen, spell check

- Insert & format images & media

- Add a caption to an image

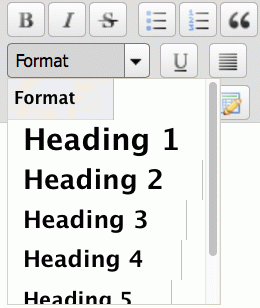
- Format paragraph & heading styles

- Underline and justify

- Paste as plain, paste from Word, remove formatting

- Indent, outdent lists

- Undo, redo

- Upload and link to documents

- Insert tables

Formatting paragraph & heading styles
In order to create readable and accessible content hierarchy use the paragraph and heading styles dropdown to format your content.
Search engines use the headings to index the structure and content of your web pages.
Users skim your pages by its headings. It is important to use headings to show the document structure.
Heading 1 will usually be used by the page title and is the most important heading on the page. Heading 6 will be the least important.
Blockquote
Blockquotes are a good way to call attention to paragraph or quote. To create one follow the instructions below:
- Select the text that would like to use
- Click on the quotes icon
Insert & format Images & Media
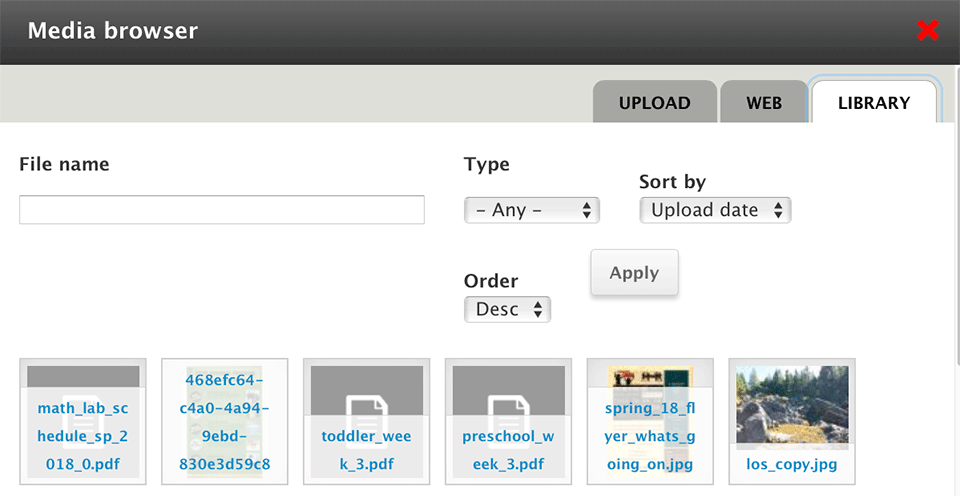
The Media browser allows you to add images from your computer, other websites and images that you have uploaded to your media library. It also allows you to add youtube and vimeo videos and embed them directly on the page.
Steps to insert media
- Place cursor where you want the image or video to appear.
- Click the media browser icon in the toolbar.

- To upload a new image click “Choose File”, select the file from your computer, then click Next or Upload.
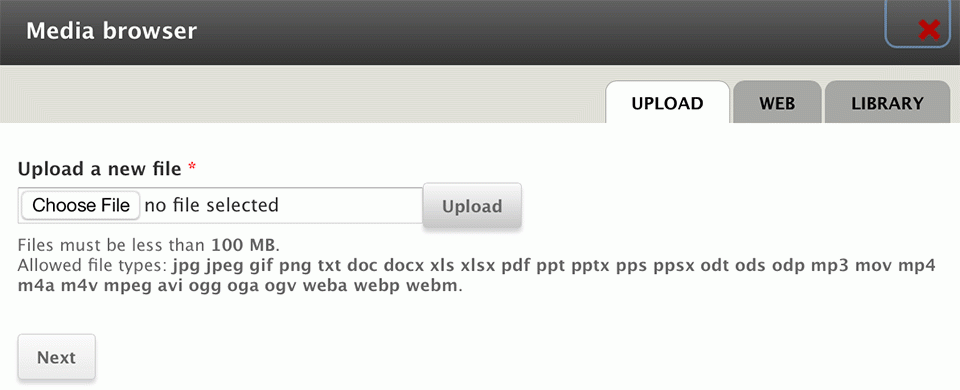
- To add videos from youtube or vimeo, click the “Web” tab and paste the URL of the video
- To add a video or image from the media library, click “Library” and choose the file you want to include. If there are a lot of files in the library you can search by file name to find what you are looking for.
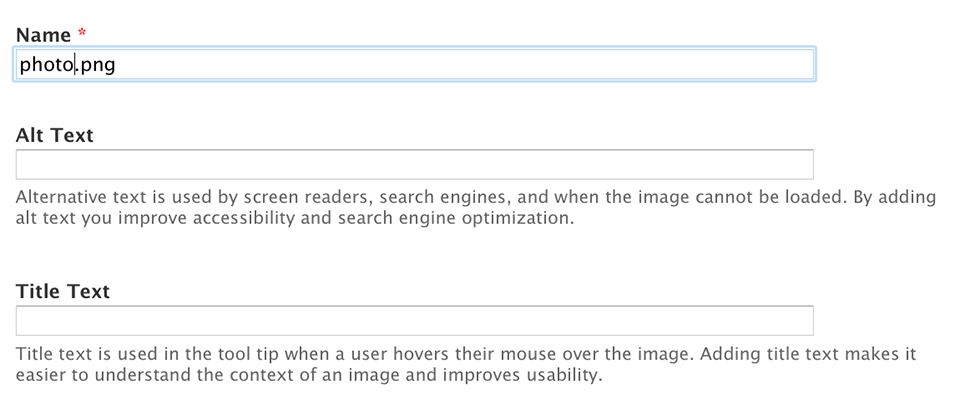
- Step through the additional screens making sure to add “alt” text where appropriate and submit.
Resizing images
If you would like to reduce the width and height of an image you have inserted, select the image by clicking on it and then click and drag in one of the corner handles until it is the width that you want. You can hold down the shift key on your keyboard to contrain the proportions of the image.
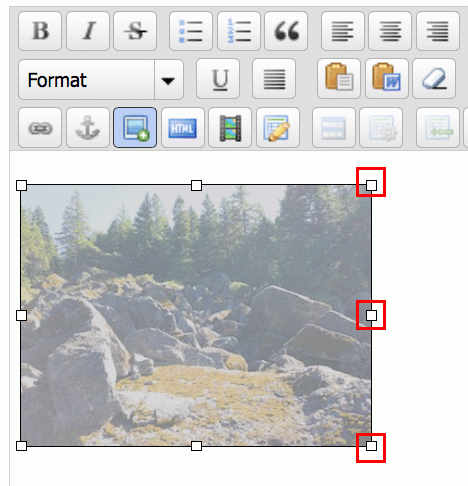
Image Captions
Once you have inserted an image you can add a caption.
- Click on the image
- Click the “add a caption to an image” icon in the toolbar.

- The image caption dialog appears
- Type your caption in the caption box
- Choose a float setting (optional). Left will wrap text below the image to the right side, right will wrap text around the left side of the image. Note, results vary depending on the size of the image.
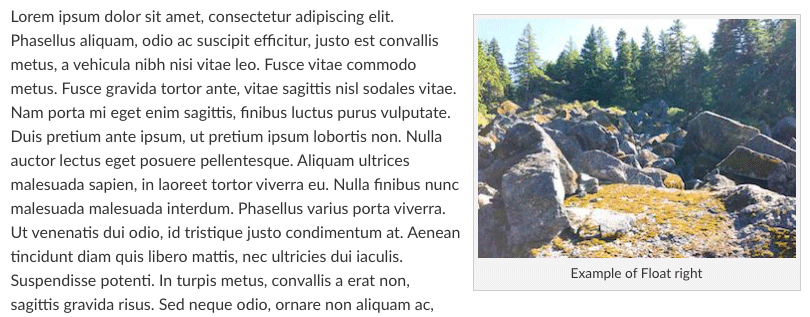
If you want to remove the caption, select the caption text and delete it then select the image and click the “remove formatting” icon in the toolbar.
Pasting Content
If you are copying and pasting in content from a word document, it is important to use the Paste tool. Paste in your text in with "Paste as plain text" icon or "Paste from Word" icon.

Linking to Pages & External Web Sites
When building a site it is common to link from one page to another. You can easily do this using the “Link to content” tool. The tool also allows for linking to other websites.
Link to Pages
- Select the text that will be the link
- Click the “Link to content” icon

- Start typing the page title of the page that you want to link to in the “Search for Content” field. Results will be displayed below the field and you can select the appropriate one.
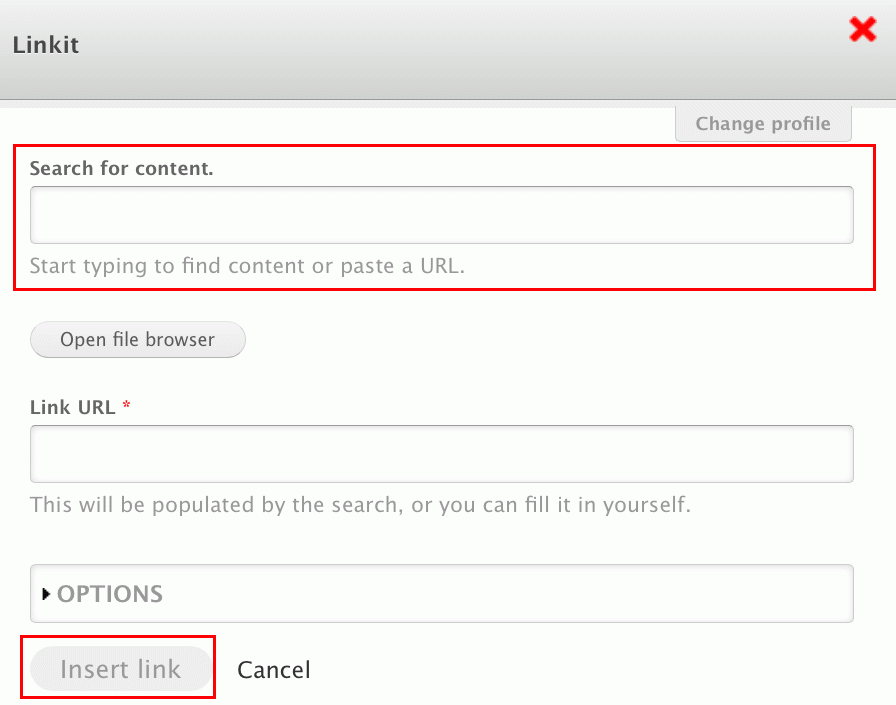
- Click “insert link”
- To link to external website simply copy the address of the site then paste it into the “Link URL” field. Searching isn’t necessary.
Upload and link documents
Use the link tool to upload and link to documents (pdfs, docx, xslx, etc.)
- Select the text you want to use for the link
- Click the link icon . This will bring up the Insert/Edit Link dialog.

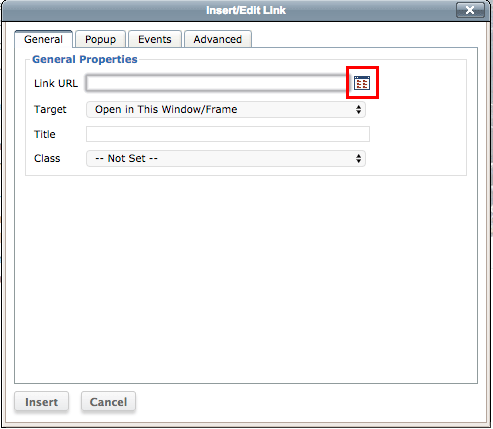
- To upload a new file click the browse icon
- Click upload
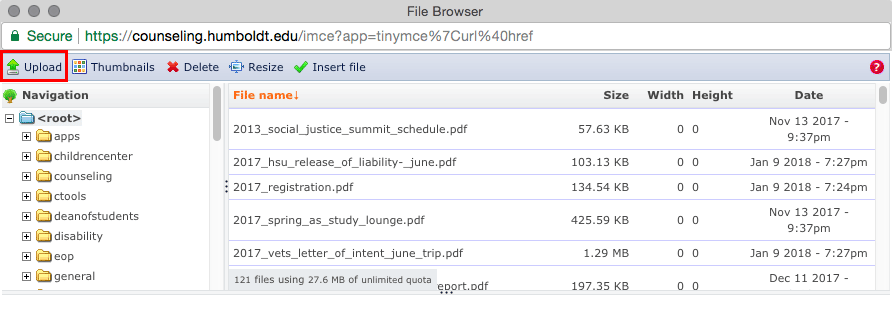
- Click choose file and select the file from your computer.
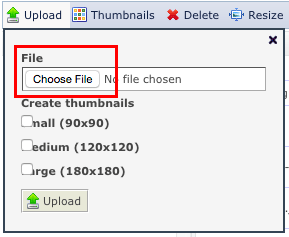
- Click upload. The file you uploaded will be highlighted in the browser.
- Double click it or click insert file above
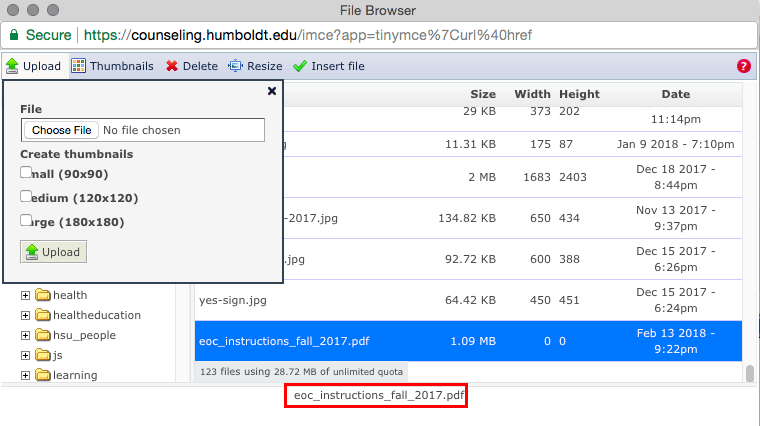
- To link to an existing file skip the upload portion above
Working with Tables
- Place the cursor where you want to insert a table into your text and select the Table button on the toolbar. Tables should only be used for tabular data and never as a way to layout or organize non-tabular content.

- Create the framework for your table by selecting the appropriate properties from the list below and click Insert
- Rows: Select the minimum number of rows you will need. More can easily be added later.
- Columns: Select the number of column you will need. Again, more can be added later
- Headers: If the table will have column or row headings, select those here. This changes the table’s appearance and improves accessibility.
- Table Caption: The text entered here will appear as a title above the table.
- Width: This creates a fixed width for the table. Leaving this blank will allow the table to expand to the available space and make it responsive to various screen widths.
- Border size, Alignment, Cell Spacing, Cell padding: Leave these blank to allow the styles for the site to control these options.
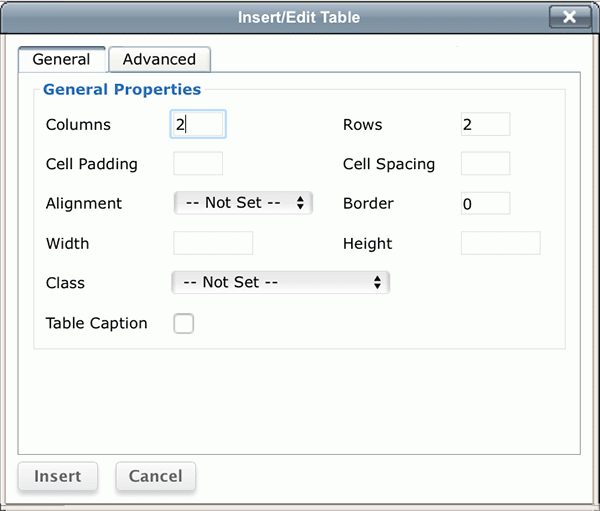
- The table will be inserted into the body of the page, so you can enter and edit the contents. Use the table buttons on the toolbar to change the configuration of your table as described below. Note: The table’s appearance will be different once saved.

- To add a new row at the bottom of the table:
- Select the last row in the table.
- Select Row > Insert Row After.
- To change the cell settings, click on the cell and select Table Cell Properties to open the configuration dialogue box.
- Adjust settings as necessary for the cell.
- To resize a cell, enter a Width value. Note that adjusting the width of one cell changes the width for the entire column.
- Ensure that the Text format is WYSIWYG before saving the page. If this setting is not changed, the table will not display properly and some settings will be lost.
